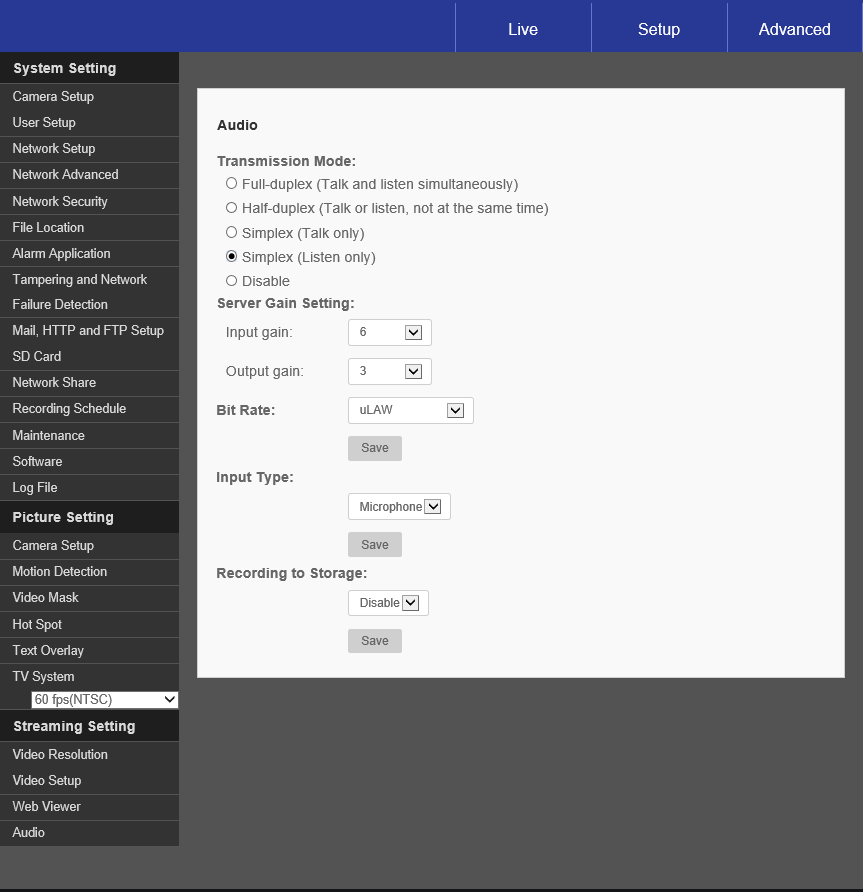
- Log into the camera and make sure audio is enabled. Set
to either Simplex (listen only) or full-duplex (talk and listen
simultaneously) depending on the application.
- Set Bit Rate setting uLaw and adjust gain appropriately
(Input gain will control the sensitivity or volume of the audio it picks
up, higher is louder, lower is quieter). Having it set too high can cause
static or white noise.

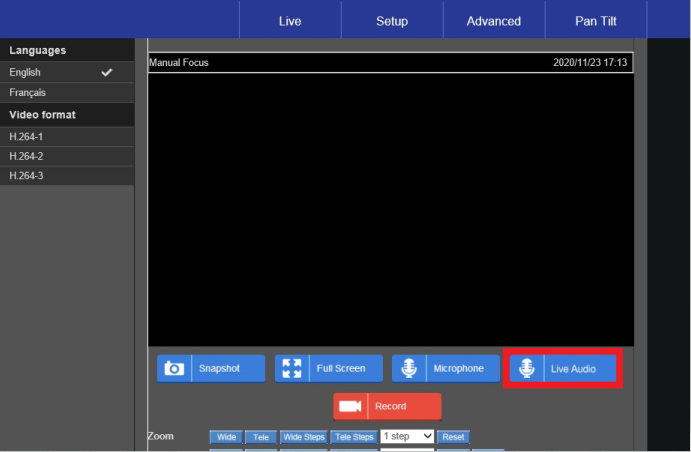
2. Make sure you can hear audio in the
browser. Some cameras require a certain web browser like Internet Explorer to
display video and provide audio. *Note you may have to click a live audio
button or something similar to start playing audio. If you still can not hear
audio at this point you will want to check your that your line amp microphone
is connected properly or test it on another device like a computer.

3. Once you have verified audio in the
browser you can move to the recorders settings. Log into the recorder and click
the setup button and then click cameras on the side menu. Click on the camera
and go over to the audio tab. Make sure you have it set to record and click
save.

4. To test that the camera is recording
audio you export a clip (make sure to check the "include audio" box)
or you can listen to the live audio using command station or the mobile app.
5. Mobile app - Connect to the recorder and
tap on the camera to view the camera in one camera grid layout. Tap the audio
button in the lower right-hand corner

6. Command Station - Connect to the recorder,
right click on the camera in the grid and then mouse down to Audio and click
play audio

7. If you still can not hear audio from the
camera reboot the recorder and then test it again in command station or the
mobile app.